Create Table CONTACTS
Create XX_CONTACTS (CONTACT_ID, FIRST_NAME, LAST_NAME, EMAIL_ADDRESS, MOBILE_PHONE, HOME_PHONE) table using the following script.
CREATE TABLE xx_contacts( contact_id NUMBER
, first_nameVARCHAR2(100)
, last_nameVARCHAR2(100)
, email_addressVARCHAR2(100)
, mobile_phoneVARCHAR2(100)
, home_phoneVARCHAR2(100)
, created_by NUMBER
, creation_date DATE
, last_update_by NUMBER
, last_updated_dateDATE
, last_update_loginNUMBER);
In this table the last five columns, called who columns, are used for auditing purposes and to track the owner of the records in the table.
Create Entity Object
1. Click on project and click on New.
2. Select ADF Business Components in the Business Tier under Categories section > Select Entity Object in the Items secion. Click Ok button.
3. Select APPS for Database Schema, XX_CONTACTS (table created in Create Table section). Provide ContactsEO for the Name of Entity Object, enter oracle.apps.inv.ctc.schema.server for package. Entity Objects are in general created in schema package. Click Next.
4. Accept the defaults in steps 2 to 5. Navigate to Finish page that shows the Attributes. Click Finish on this page.
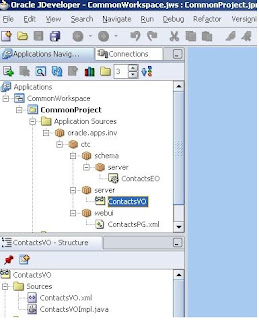
5. This creates ContactsEO in package oracle.apps.inv.ctc.server.schemapakage
Create View Object
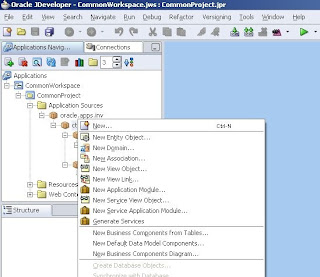
1. Right click on package ctc and click on New
2. Enter oracle.apps.inv.ctc.server for package and ContactsVO for View Object name and click Next
3. On Entity Objects page select ContactsEO from the Available and move to Right by clickin on “>” button.
4. On Attributes page click on “>>” button to select all the available attributes from ContactsEO to ContactsVO.
5. On the following pages accept default values and click next on pages Step 4 to Step 7 to go to Finish page. Click Finish button on this page to create ContactsVO.
6. These steps create ContactsVO in package oracle.apps.inv.ctc.server
Create Application Module
1. Right click on server and click on New Application Module
2. Enter oracle.apps.inv.ctc.server for package and ContactsAM for Name and click Next
3. On VO selection page select ContactsVO from package oracle.apps.ctc.server and click on “>” button to assicateattacheContactsVO instance to this Application Module. Rename the instance Name to ContactsVO. Click Next.
4. Accept the defaults on Step3 and Step4 pages and click Next button to navigate to Finish page, where we can see ContactsVO instance being attached to this Application Module. Click Finish to complete AM creation.
5. Now the AM is available under oracle.apps.inv.ctc.server package. Select ContactsAM, Now in this AM ContactsVO has to be initialized to get the values from the table. In the Structure panel down there, double click on ContactsAMImpl.java file to edit the code.
6. Edit the ContactsAMImpl.java to add code to initialize ContactsVO as shown in the selected section of below figure.
7. Save the project by clicking on Save all button
Create page ContactsPGalong with a Controller
1. Right click on project and click on New
2. Select OA Components under Web Tier > Select Page under Items. Click on OK button
3. Enter ContactsPG for Name and oracle.apps.inv.ctc.webui for package and click OK to create page ContactsPG under package oracle.apps.inv.ctc.webui.
Once the page is created, in property inspector add AM Definition = oracle.apps.inv.ctc.server.ContactsAM
4. Now select the ContactsPG, select region1 and change the ID of this region on Property Inspector panel on rightside. In this example ContactPG is the ID provided for region1.
5. Rightclick on ContactsPG region, and add new region. Name it as ContactsHdr and change the Region Style to Header.
6. Similarly add a table region under ContactsHdr.
7. Right click on ContactsPG, then click on Set New Controller.
8. Enter oracle.apps.inv.ctc.webui for package and ContactsCO for name and click Ok to create a controller. Once the controller is created, open the controller code and add the code that calls Application Module, which initializes the ContactsVO.
9. Under ContactsTbl table, add additional items to display the contact details.
10. Change the properties of this item to add view instance, view attribute and prompt in the property inspector.
11. Likewise create additional items under the table structure.
Run the page to see contacts.
Right click on ContactPG and click on RUN to see the results.
Final output:


